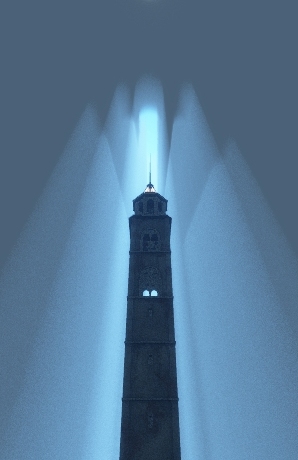
Sunbeams, called Godrays by e-on, were added to Vue in version 6. They appear when clouds break up the light coming from the sun light source. The atmosphere must be a spectral atmosphere and sunbeams must have been enabled. Three atmospheres are included with Vue that create godrays but creating your own can be challenging. Even more challenging though is trying to control where they appear. In this tutorial I’ll cover one method for creating them that I’ve discovered, rather than trying to create sunbeams by modifying the cloud parameters I make holes in the cloud.
A Bit of Atmosphere
It’s easiest to start using this technique with a very solid cloud layer. It can be used with a cloud layer with less cover but I find it easier to start with a solid layer and reduce its solidity once the desired effect has been created.

If you want to make one yourself here is my recipe: start by loading the Hole in Heaven atmosphere. Open the Atmosphere Editor and in the Cloud tab increase the Cover setting to over 90% and the Density to 40%. If you render the picture now you should see very little sunlight shining through the clouds.
Now we need to modify the cloud layer so that we can make holes in it. To do this in the atmosphere editor we need to select the Cloud tab. With the Cumulous layer selected right click on the material preview and select Edit Material. Next select the Lighting and Effects tab. Enable Dissolve Near Objects then set Distance to 0 and Accuracy to 75%. To make it easier to see the beams I find changing the cloud’s volumetric colour to black helps.
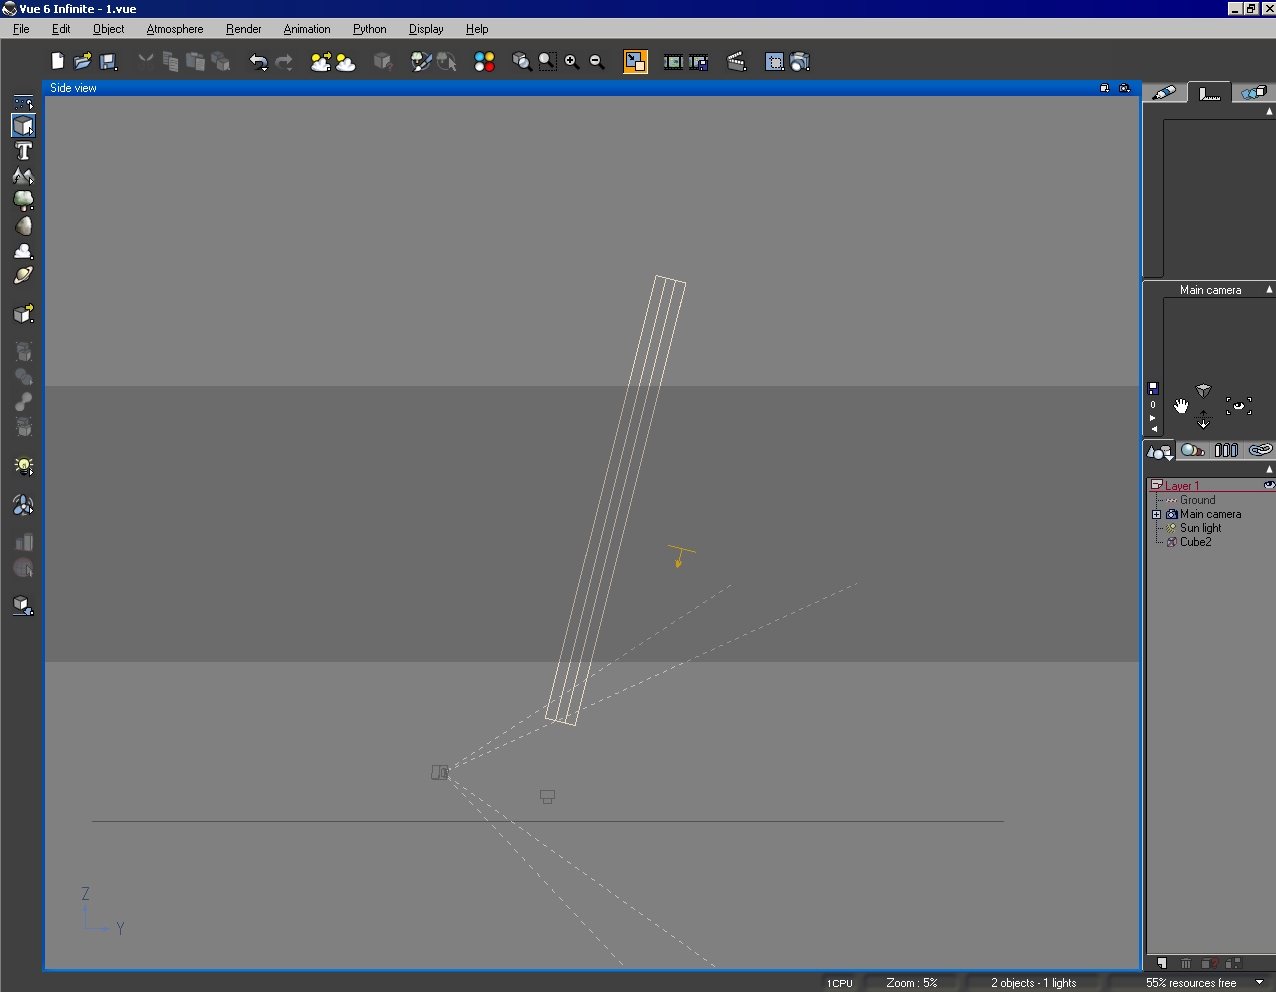
Select the Sun light object and change its Orientation to Pitch 180, Yaw 0 and Roll 0 this will point it straight at the ground.
Save this atmosphere so you can use it again in future.
Making a Hole
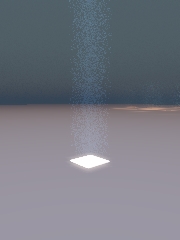
Now you are ready to make your first hole. The easiest object to make a hole with is a cube. Add a new cube to the scene and then modify it so it is 50m wide and deep and 1000m tall. Position it so its bottom is below the bottom of the cloud layer and its top is above it. Right click on it in the object tab and set it to Hide from Render. Render the image and you should get a square beam of light shinning from above.
By copying, pasting and moving the object you can make more holes or, if you overlap the objects, make the hole bigger.
You can use any of Vue’s standard primitive, group of objects, imported objects or metablobs to make the hole. I’ll come back to cover a few other ways of making the hole in a minute but first I want to explain how to aim your rays and how to improve the quality of the final render.
Aiming the Rays
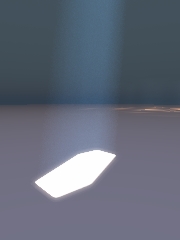
At the moment your ray is pointing straight down. You can change the angle of the sun. However if the sun’s angle is too steep it may not get through the hole in the clouds. When this happens just tilt the objects to a similar angle to the sun and the light will break through again. Make sure that the top and bottom of the hole cutting objects are still outside the cloud otherwise the hole won’t go all the way through.

Messing Around with Your Clouds
Now you’ve got aimed god rays you can change the settings on the cloud layer to make a more interesting sky.
Smooth Rays
You’ve probably noticed that you’re Godrays have a grainy quality to them. You can reduce this by modifying you’re atmosphere. Open the Atmosphere Editor and select the Sky, Fog and Haze tab. Under Global Settings Increase the Quality Boost. I find a Quality Boost of 10 produces good results but does lead to renders being a lot slower.
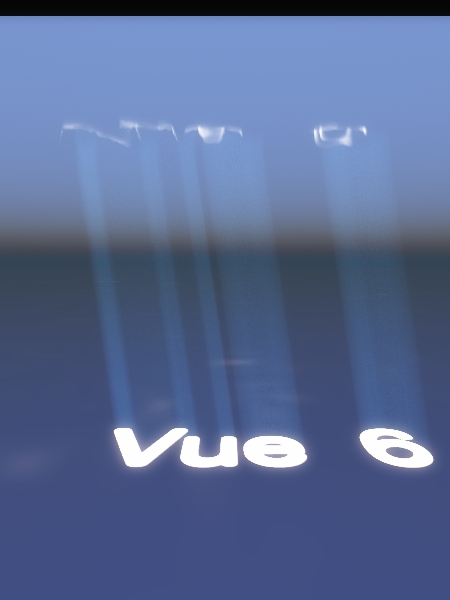
Writing from the Sky
One pleasing effect that you can achieve very easily is to cut words into the cloud. Make a text object. In the Extrusion tab set the extrusion to 1000m. Rotate the object so it lays flat and move it so it cuts through the cloud layer. Remember to hide it from rendering.
The Biscuit Cutter Method
You can design shapes for holes in vector drawing packages such as Freehand, Illustrator or Expression. Draw the shape you want to cut in your drawing software and save it in a format Vue can open. I’ve found I get the best results with eps files but I suspect it will depend on the graphics software you are using. Now in Vue create a text object. In the Text tab select Import Vector Graphics and load your file. Set its Extrusion to 1000m, rotate it so it lies flat and position it so its top and bottom are above and below the cloud layer. Now render and with a bit of luck you should get a hole the same shape as the drawing .

Softening the Edges
To soften the edges of the godrays falling on the ground select the sun and in its settings change softness to a value between 5 or 10 degrees to get a softer effect. You may need to play with other atmosphere settings or render settings to get the effect you are looking for.
Acknowledgements
Thanks to JC for his help in refining the quality of the render. The tower is the Campanile Santa Lucia model from Cornucopia 3d.